How to Move Plumbing in a Bathroom?
Bathroom renovations often involve repositioning fixtures like sinks, toilets, and showers, which means one major task: moving the plumbing. Whether you’re redesigning the layout or simply upgrading your bathroom, knowing how to move plumbing in a bathroom is essential to achieving the best results.
Moving plumbing isn’t a small job, but with the right planning and execution, it can completely transform your bathroom’s functionality and appearance. In this guide, we’ll cover the steps, considerations, and costs associated with moving plumbing in a bathroom.
Why Move Plumbing in a Bathroom?
There are several reasons why you might need to move plumbing during a bathroom remodel:
- New Layout: If you’re changing the position of key fixtures like the toilet, sink, or shower, the plumbing will need to be relocated accordingly.
- Improving Functionality: Sometimes moving plumbing can make a bathroom more functional, such as placing the sink in a more accessible location or improving the water flow for showers.
- Increasing Space: If you’re expanding your bathroom, moving the plumbing may be necessary to create a more open layout.
- Fixing Old Plumbing: During a remodel, you might discover old or faulty plumbing that needs to be replaced or moved to prevent future issues.
Considerations Before Moving Plumbing
Moving plumbing in a bathroom can be complicated and may require hiring a professional plumber. Before diving into the project, there are a few important factors to consider:
Building Codes
Local building codes govern how plumbing should be installed and moved. These codes cover aspects like pipe sizes, venting, and fixture placement. It’s crucial to understand your local plumbing codes or hire a professional who does to ensure the work complies with regulations.
Structural Integrity
Moving plumbing can involve cutting into walls, floors, or ceilings. If you’re dealing with load-bearing walls or foundational structures, you’ll need to be cautious about how the work affects the stability of your home. Consulting with a contractor is advisable if structural changes are required.
Budget
Relocating plumbing can significantly increase the cost of your bathroom remodel. Costs can vary depending on the complexity of the job, the materials required, and whether you’re moving pipes through floors or walls. Planning your budget in advance will help you avoid unexpected expenses.
Drainage and Venting
When moving plumbing fixtures like toilets or sinks, the drainage system must be adjusted. Proper venting is also essential to prevent sewer gases from entering your bathroom and ensure water flows smoothly through the pipes.
How to Move Plumbing in a Bathroom: Step-by-Step Guide
If you’re ready to move forward with the project, here’s how to approach moving plumbing in a bathroom. Keep in mind that while some aspects of this process can be done by experienced DIYers, major plumbing relocations are best left to licensed professionals.
Step 1: Create a New Layout Plan
Start by designing your new bathroom layout, taking into account where you want each fixture to be located. Make sure your new layout allows for proper drainage and venting. It’s important to measure the space accurately and ensure the new plumbing layout will work with the existing infrastructure.
Step 2: Shut Off Water Supply
Before starting any work on plumbing, it’s essential to shut off the water supply to the bathroom. This prevents water from flooding the area while you work on the pipes. Drain the existing pipes by turning on the faucets until no water flows out.
Step 3: Access the Plumbing
To move the plumbing, you’ll need access to the pipes. This often involves cutting into walls, floors, or ceilings to reach the water supply lines and drainpipes. If your pipes are located in the floor, you may need to remove sections of the flooring.
- Pro Tip: Use a stud finder to locate any structural supports in the walls or floor before cutting. This helps avoid damaging important parts of the framework.
Step 4: Disconnect Existing Pipes
Once you’ve exposed the pipes, the next step is to disconnect them. Use a pipe wrench to loosen the fittings, then carefully remove the pipes connected to the fixture you’re moving. Be prepared for some residual water in the pipes, so keep a bucket handy to catch any spills.
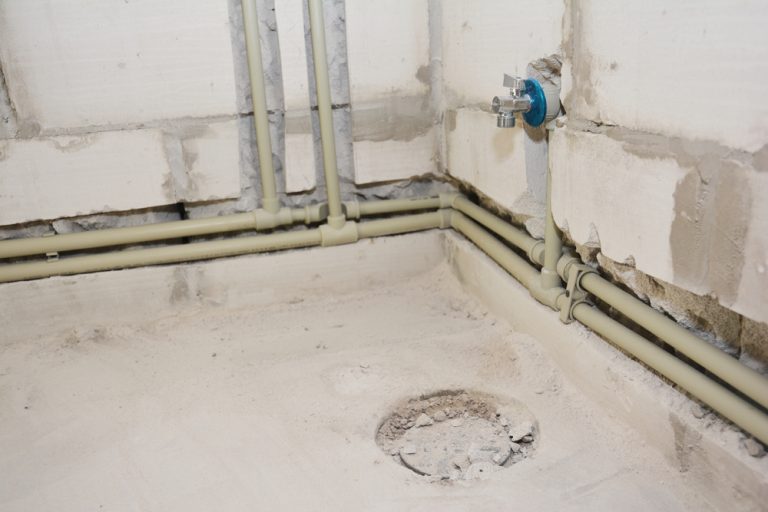
Step 5: Reroute Water Supply Lines
To move the fixture to its new location, the water supply lines will need to be rerouted. Depending on the type of pipes in your home (copper, PVC, or PEX), this may involve cutting, soldering, or fitting new pipes to extend the water supply to the new fixture location.
- Pro Tip: If you’re unsure about cutting or soldering pipes, it’s best to consult a professional plumber to ensure everything is properly connected and leak-free.
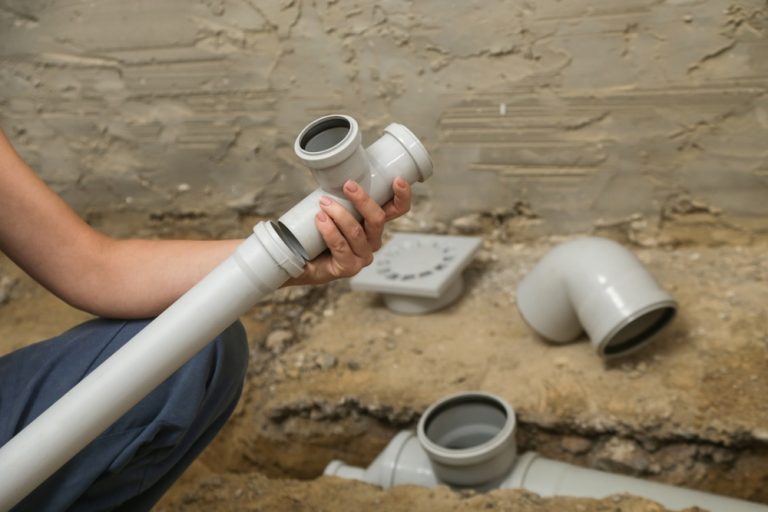
Step 6: Reroute Drain Pipes
Moving a toilet, sink, or shower requires moving the drainpipes as well. These pipes carry wastewater out of your bathroom and must be properly sloped to prevent clogs or backups. You’ll need to cut the existing drainpipe and extend it to the new location using appropriate pipe fittings.
Step 7: Adjust Venting
If you’re moving a fixture like a toilet or shower, the vent pipe (which allows sewer gases to escape) may also need to be moved or extended. The venting system is crucial for maintaining proper air pressure in the plumbing system, so it’s important to ensure this step is done correctly.
Step 8: Reconnect Fixtures and Test the System
Once the pipes have been moved to the new locations, reconnect the fixtures. This includes attaching the water supply lines and drainpipes to the new sink, toilet, or shower. After everything is connected, turn the water supply back on and test each fixture to ensure there are no leaks or issues with drainage.
How Much Does It Cost to Move Plumbing in a Bathroom?
Moving plumbing in a bathroom can vary significantly in cost depending on the complexity of the job. Here’s a general breakdown of the costs involved:
- Basic Plumbing Move: Moving a single fixture, such as a sink, may cost between $500 and $1,500 if the pipes are easily accessible.
- Full Plumbing Relocation: Moving multiple fixtures or rerouting pipes through walls or floors can cost between $1,500 and $4,000, depending on the extent of the work.
- Labor Costs: Professional plumbers typically charge between $45 and $200 per hour, depending on location and experience.
To save on costs, you might consider doing some of the demolition or preparation work yourself, but it’s important to leave the actual plumbing work to a licensed professional.
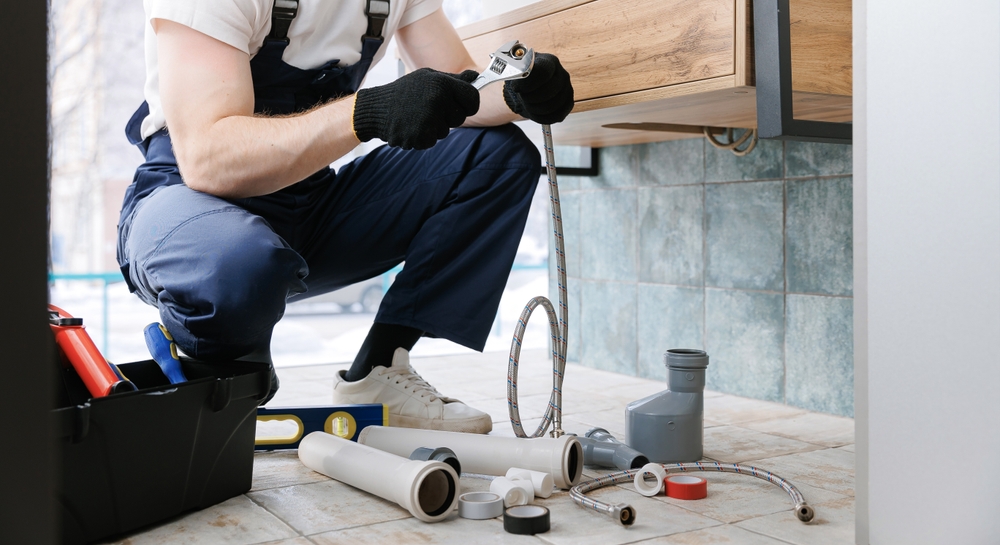
DIY or Hire a Professional?
When deciding whether to move plumbing yourself or hire a professional, it’s essential to evaluate the scope of the project. While small jobs like relocating a sink may be manageable for experienced DIYers, more extensive work involving drainage and venting should always be handled by a licensed plumber. Incorrectly installed plumbing can lead to serious water damage, mold growth, and expensive repairs down the line.
Conclusion
Learning how to move plumbing in a bathroom is an essential skill for homeowners undertaking major bathroom renovations. While it’s a complex process that often requires professional expertise, understanding the steps involved can help you make informed decisions and plan your project effectively.
Whether you’re moving a sink a few feet or relocating your entire bathroom layout, following the right steps and considering the costs and challenges will ensure your plumbing relocation is successful.