How to Make Mini Wreaths for Kitchen Cabinets?
Decorating your kitchen with mini wreaths is a charming way to add a festive touch or simply enhance the décor year-round. While you can buy ready-made mini wreaths, making them yourself allows you to customize the design, size, and materials to perfectly match your kitchen’s style.
If you’re wondering how to make mini wreaths for kitchen cabinets, this guide will walk you through the process step-by-step. Whether you’re a seasoned crafter or a beginner, creating these small wreaths is a fun and rewarding project.
Gathering Materials for Mini Wreaths
Before you begin making mini wreaths for kitchen cabinets, it’s important to gather all the necessary materials. The great thing about DIY wreaths is that you can choose from a variety of materials depending on the look you want to achieve.
Basic Materials
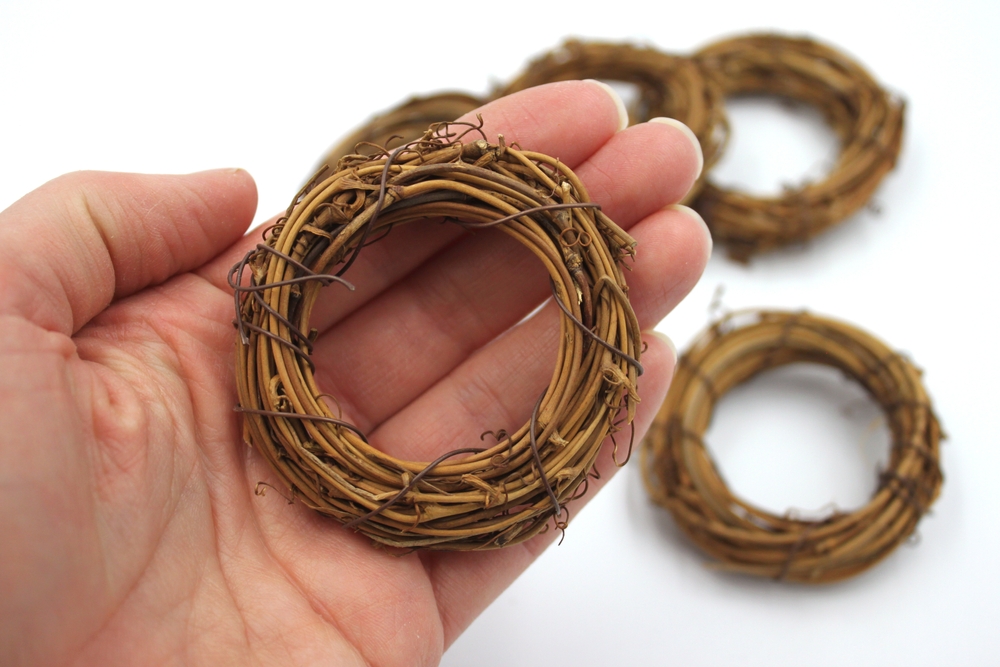
- Wreath Forms: Mini wreath forms can be found at most craft stores. They are typically made of wire, foam, or grapevine. The size of the wreath form will determine the size of your finished wreath, so choose a size that complements your kitchen cabinets. For kitchen cabinets, a 6-inch to 8-inch wreath form usually works well.
- Greenery or Foliage: You can use faux greenery, such as eucalyptus, pine, or boxwood, to create a classic and long-lasting look. Alternatively, you can use fresh greenery if you prefer a natural scent and texture. If you want a more colorful wreath, consider using floral picks or dried flowers.
- Ribbon: Ribbon is used to hang the wreaths on the cabinet doors and can also be added as a decorative element. Choose a ribbon that matches your kitchen décor, whether it’s a festive holiday pattern or a simple, elegant satin ribbon.
- Hot Glue Gun: A hot glue gun is essential for securing the greenery and other decorative elements to the wreath form. Make sure to have plenty of glue sticks on hand.
- Scissors or Wire Cutters: You’ll need scissors or wire cutters to trim the greenery and cut the ribbon to size.
Optional Decorative Elements
- Berries: Faux berries, such as red holly berries or white mistletoe, can add a pop of color and a festive touch to your mini wreaths.
- Pinecones: Small pinecones are perfect for adding texture and a rustic feel to your wreaths. They can be left natural or painted to match your theme.
- Ornaments: Mini ornaments or bells can be attached to the wreaths for a holiday look. These can be found in various colors and designs to suit your style.
- Twine or String: Twine or string can be used as an alternative to ribbon for a more rustic or farmhouse-style wreath.
Also Read – How to Insulate Inside Kitchen Cabinets?
Step-by-Step Guide to Making Mini Wreaths
Now that you have your materials ready, it’s time to start crafting your mini wreaths for kitchen cabinets. Follow these steps to create beautiful and customized wreaths that will add a touch of charm to your kitchen.
Step 1: Prepare the Wreath Form
- Select Your Wreath Form: Begin by selecting the wreath form that best suits your desired wreath size. For a more natural and rustic look, a grapevine wreath form is ideal. If you prefer a more structured wreath, a wire or foam form works well.
- Optional Preparation: If you’re using a foam wreath form, you may want to wrap it in floral tape or ribbon before attaching the greenery. This will help cover any gaps and create a more finished look.
Step 2: Attach the Greenery
- Cut the Greenery: Using scissors or wire cutters, cut the greenery into smaller pieces that are easy to work with. The length of the pieces will depend on the size of your wreath form, but aim for 3-4 inches for a balanced look.
- Start with a Base Layer: Begin by attaching the greenery to the wreath form using hot glue. Start with a base layer, gluing the greenery around the entire form in one direction. Overlap the pieces slightly to create a full and even coverage.
- Build Up the Layers: Once the base layer is in place, start adding more layers of greenery to create depth and dimension. Alternate the direction of the greenery to give the wreath a more natural and organic appearance. If you’re using a combination of different types of greenery, mix them together for added texture and interest.
Step 3: Add Decorative Elements
- Attach Berries or Pinecones: If you’re adding berries, pinecones, or other decorative elements, now is the time to attach them. Use hot glue to secure them to the wreath form, spacing them evenly around the wreath. Be mindful of the overall balance and avoid overcrowding any one area.
- Incorporate Ornaments: For a festive touch, add mini ornaments or bells to the wreath. These can be attached with hot glue or tied on with a piece of twine. Ornaments should be evenly distributed around the wreath to create a harmonious design.
Step 4: Add the Ribbon
- Cut the Ribbon: Measure and cut a piece of ribbon that is long enough to loop around the wreath and hang from the cabinet door. The length will depend on how low you want the wreath to hang on the door.
- Attach the Ribbon: Loop the ribbon around the top of the wreath, bringing the ends together at the top. You can secure the ribbon with a small dot of hot glue or tie a knot to keep it in place. If you want the wreath to be adjustable, consider tying a bow at the top of the ribbon.
Step 5: Hang the Wreaths on the Cabinets
- Determine the Placement: Before attaching the wreaths, decide where you want them to hang on your kitchen cabinets. Centering the wreaths on each cabinet door creates a symmetrical and polished look. If your cabinets have multiple doors, consider spacing the wreaths evenly for a cohesive design.
- Secure the Wreaths: To hang the wreaths, you can use small adhesive hooks, command hooks, or even removable adhesive strips on the inside of the cabinet door. Attach the ribbon to the hook or adhesive, ensuring that the wreath hangs securely and at the desired height.
- Check for Alignment: Once the wreaths are hung, step back and check for alignment. Adjust the placement of the wreaths as needed to ensure they are straight and evenly spaced.
Tips for Customizing Your Mini Wreaths
Making mini wreaths for kitchen cabinets allows for endless customization possibilities. Here are some tips to help you personalize your wreaths to match your kitchen’s décor and your personal style.
Choose Seasonal Themes
- Holiday Wreaths: For the holiday season, consider using traditional colors like red, green, and gold, along with festive elements like holly berries, pinecones, and ornaments. You can even add a small holiday-themed sign or tag to each wreath.
- Year-Round Wreaths: For a year-round look, opt for neutral greenery like eucalyptus or boxwood and add simple accents like white berries, twine, or wooden beads. This will create a versatile design that complements your kitchen no matter the season.
Experiment with Different Materials
- Fabric Wreaths: If you want to create a unique and textured look, consider making wreaths out of fabric strips or burlap. These materials add a cozy, farmhouse feel and can be easily customized with different colors and patterns.
- Natural Elements: Incorporate natural elements like dried flowers, herbs, or even small branches for a more organic and earthy wreath. These materials not only look beautiful but can also add a pleasant fragrance to your kitchen.
Personalize with Monograms or Initials
- Add a Personal Touch: For a truly personalized wreath, consider adding wooden or metal monograms or initials to the center of each wreath. These can be painted to match your kitchen’s color scheme and add a unique touch that reflects your family’s style.
Create a Set of Coordinating Wreaths
- Consistency in Design: If you have multiple cabinets, creating a set of coordinating wreaths can help tie the entire kitchen together. Use the same greenery and ribbon for each wreath, but consider adding subtle variations, like different decorative accents, to keep the design interesting.
Conclusion
Making mini wreaths for kitchen cabinets is a fun and creative way to add a personal touch to your kitchen décor. By following the steps outlined in this guide, you can create custom wreaths that perfectly match your style and bring a touch of charm to your kitchen. Whether you’re decorating for the holidays or simply looking to enhance your kitchen year-round, these mini wreaths are sure to make a big impact.
With the right materials, a bit of creativity, and some attention to detail, you can easily make beautiful mini wreaths that will delight you and your guests every time you enter the kitchen.