How to Replace Kitchen Floor?

Replacing a kitchen floor can seem like a daunting task, but with the right guidance, it’s a project that can refresh your entire kitchen space. Whether you’re updating the look, dealing with damage, or improving functionality, knowing how to replace kitchen floor step by step is essential.
In this guide, we’ll walk you through the process of replacing your kitchen floor, from removing the old flooring to installing the new materials.
Why Replace a Kitchen Floor?
Before diving into the steps of how to replace kitchen floor, it’s important to understand why you might want or need to tackle this project. Kitchen floors undergo a lot of wear and tear due to daily use, exposure to spills, foot traffic, and constant cleaning. Over time, damage such as cracks, scratches, or stains can detract from the kitchen’s appearance and functionality.
Aesthetic Update
A fresh kitchen floor can dramatically enhance the look of your space. Whether you’re aiming for a modern, rustic, or traditional look, replacing the flooring is one of the easiest ways to achieve the style you want.
Aesthetic Update
Old flooring materials may not hold up well over time, particularly in high-moisture areas like the kitchen. Replacing your kitchen floor with more durable materials can increase its lifespan and help resist water damage, scratches, and other common issues.
Choosing the Right Flooring Material
One of the most important decisions when learning how to replace kitchen floor is selecting the right flooring material. Different materials offer varying levels of durability, style, and ease of installation.
Tile Flooring
Tile is a popular choice for kitchens due to its water resistance and durability. Ceramic and porcelain tiles are easy to clean and available in a wide range of styles. However, tile can be cold and hard underfoot, so you may want to consider using mats or area rugs for added comfort.
Vinyl Flooring
Vinyl flooring is a cost-effective and versatile option for kitchens. It’s water-resistant, easy to install, and available in designs that mimic wood, stone, or tile. Vinyl is also softer underfoot, making it a more comfortable option if you spend a lot of time standing in the kitchen.
Hardwood Flooring
If you prefer a more classic and natural look, hardwood flooring can add warmth and beauty to your kitchen. However, hardwood is more susceptible to moisture and wear, so it may require extra care and maintenance. Engineered wood is a good alternative, offering greater resistance to humidity.
Laminate Flooring
Laminate flooring is another budget-friendly option that’s easy to install and maintain. It’s durable and resistant to scratches, making it a good choice for busy kitchens. Laminate is also available in a variety of styles, mimicking the look of hardwood or tile.
Also Read – How to Hide Electrical Cords on Kitchen Counter?
Steps for Replacing a Kitchen Floor
Once you’ve chosen your flooring material, it’s time to begin the process of how to replace kitchen floor. Here’s a step-by-step guide to help you get started:
Step 1: Prepare the Kitchen
Before replacing the kitchen floor, remove all furniture, appliances, and items from the room. If necessary, disconnect appliances like the refrigerator or dishwasher and carefully move them to a different area. It’s also a good idea to cover countertops and cabinets with plastic sheeting to protect them from dust and debris during the process.
Step 2: Remove the Old Flooring
The next step is to remove the existing kitchen floor. Depending on the material, this can be a labor-intensive process. For tile floors, use a hammer and chisel to break up the tiles and remove them. For vinyl or laminate floors, you may be able to peel up the old material, but adhesive residue may need to be scraped away. If your current flooring is hardwood, you’ll need to carefully pry up each plank.
Be sure to wear protective gear, including gloves and safety glasses, to avoid injury during this step.
Step 3: Inspect the Subfloor
Once the old flooring has been removed, inspect the subfloor for any damage. The subfloor needs to be smooth, level, and free of moisture issues before installing the new flooring. If you notice any damage, such as rot or warping, repair or replace the affected sections of the subfloor.
Step 4: Install Underlayment (if necessary)
Depending on the type of flooring you’re installing, you may need to lay down underlayment. For example, laminate and vinyl flooring often require a foam underlayment to create a smooth surface and provide sound absorption. Tile floors may require a cement board or backer board for added stability.
Step 5: Lay the New Flooring
Now it’s time to install your new kitchen floor. The installation process varies based on the material you’ve chosen.
- Tile Flooring: Start by applying mortar or adhesive to a small section of the floor and placing the tiles in the desired pattern. Use spacers between tiles to ensure even grout lines. Once the tiles are laid, allow the mortar to dry before applying grout between the tiles.
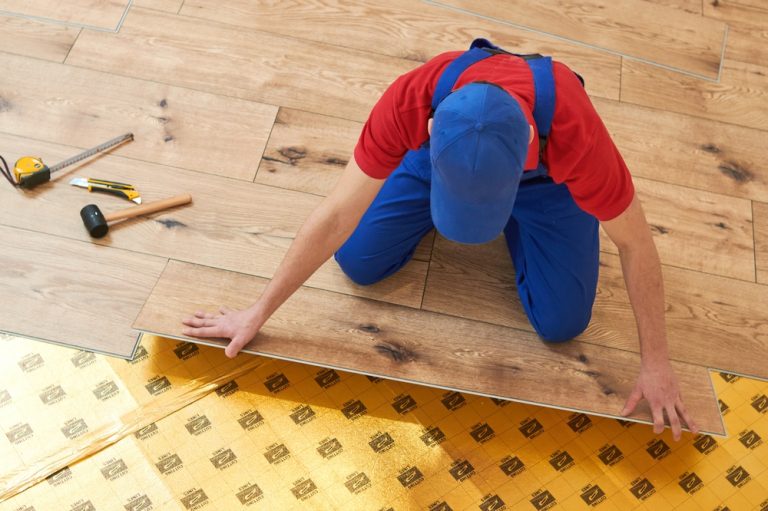
- Vinyl or Laminate Flooring: Vinyl and laminate are typically installed as floating floors, meaning they snap or click together without the need for adhesive. Start in one corner of the room and work your way out, locking the planks or tiles together. Be sure to leave a small gap around the edges of the room to allow for expansion.
- Hardwood Flooring: For hardwood or engineered wood, use nails or adhesive to secure the planks to the subfloor. Ensure each plank is tightly placed against the next for a seamless appearance.
Step 6: Finishing Touches
Once the new floor is installed, reattach baseboards and trim to cover the expansion gaps around the edges of the room. You can also reinstall appliances and furniture, making sure not to scratch or damage the new flooring in the process.
Maintaining Your New Kitchen Floor
After completing the process of how to replace kitchen floor, proper maintenance is key to preserving its beauty and durability. Regular cleaning and care will help extend the life of your new floor.
- Tile: Clean tiles with a mild detergent and water, and avoid harsh chemicals that could damage the grout.
- Vinyl and Laminate: Use a soft broom or vacuum to remove dirt and debris, and mop with a damp (not wet) mop.
- Hardwood: Keep hardwood floors clean and dry, and use a wood-safe cleaner to prevent scratches or damage.
Conclusion
Knowing how to replace kitchen floor is a valuable skill that can transform the look and functionality of your kitchen. From choosing the right materials to preparing the space and installing the flooring, each step is important for achieving the best results.
Whether you’re looking to enhance the aesthetics of your kitchen or increase its durability, replacing the floor is a project that will have a lasting impact on your home.