How to Regrout Kitchen Floor Tiles?
Over time, the grout between your kitchen floor tiles can become stained, cracked, or worn out, detracting from the overall appearance of your kitchen and potentially leading to damage. Knowing how to regrout kitchen floor tiles is a valuable skill that can help you restore the look and integrity of your kitchen floor.
In this guide, we’ll walk you through the entire process of regrouting, from removing old grout to applying new grout, ensuring a smooth and durable finish.
Why Regrouting Kitchen Floor Tiles is Important?
Before diving into the steps of how to regrout kitchen floor tiles, it’s important to understand why regrouting is necessary and beneficial.
Restore Aesthetic Appeal
- Freshen Up Your Floor: Over time, grout can become discolored or stained, making your entire kitchen floor look dirty and old. Regrouting can refresh the appearance of your tiles, making the floor look like new again.
- Uniform Look: New grout can provide a uniform color and finish, enhancing the overall aesthetic of your kitchen floor.
Protect the Tiles
- Prevent Water Damage: Cracked or missing grout can allow water to seep beneath the tiles, leading to potential damage and weakening the adhesive that holds the tiles in place. Regrouting helps seal the gaps and protects your floor from moisture.
- Extend Tile Life: By keeping the grout in good condition, you’re helping to maintain the integrity of the entire floor, which can extend the life of your tiles and avoid the need for more extensive repairs.
Materials and Tools Needed to Regrout Kitchen Floor Tiles
To successfully regrout your kitchen floor tiles, you’ll need to gather the following materials and tools:
Materials
- Grout: Choose the appropriate type of grout for your kitchen floor. Sanded grout is typically used for floor tiles with joints wider than 1/8 inch, while unsanded grout is used for narrower joints.
- Grout Sealer: After applying the grout, a sealer is used to protect it from stains and moisture.
- Water and Sponge: For cleaning up excess grout and keeping the area clean during the process.
Tools
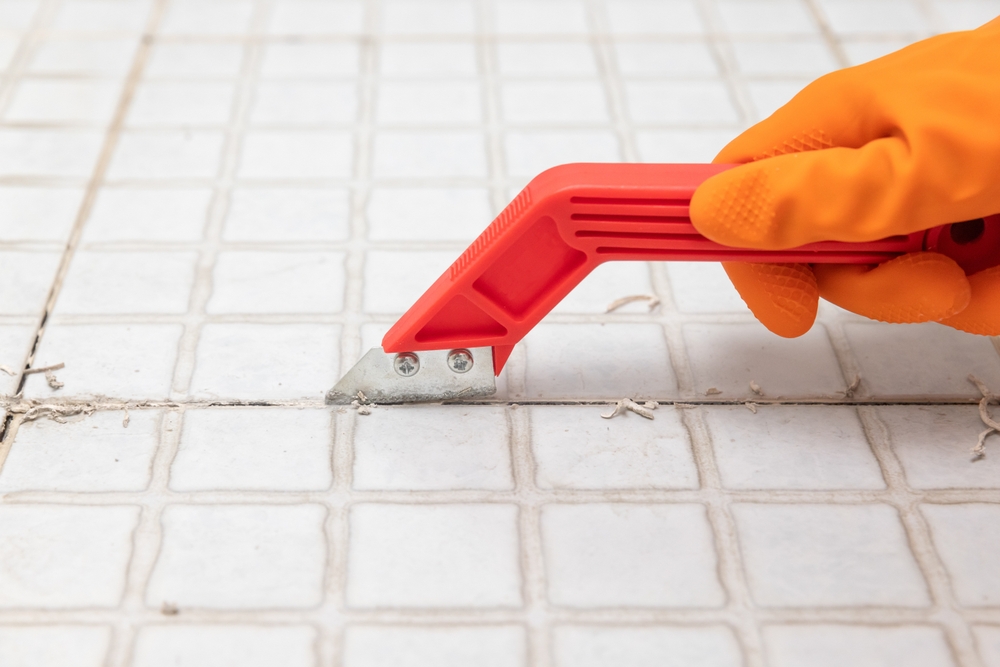
- Grout Removal Tool: This could be a manual grout saw, a utility knife, or an oscillating tool with a grout removal attachment. These tools are used to remove the old grout.
- Grout Float: A rubber grout float is used to spread and press the new grout into the joints between the tiles.
- Bucket: To mix the grout and hold clean water for rinsing your sponge.
- Trowel: A small trowel or margin trowel can be helpful for scooping and applying grout during the process.
- Scrub Brush or Toothbrush: For cleaning the joints and removing any remaining debris after the old grout is removed.
- Protective Gear: Safety glasses, gloves, and a dust mask will protect you from dust and debris during grout removal.
Also Read – How to Re-Tile a Kitchen?
Step-by-Step Guide on How to Regrout Kitchen Floor Tiles
Here’s a detailed step-by-step guide on how to regrout kitchen floor tiles, ensuring your kitchen floor looks fresh and well-maintained.
Step 1: Remove the Old Grout
- Start with the Right Tool: Begin by using a grout removal tool, such as a manual grout saw or an oscillating tool, to carefully remove the old grout from between the tiles. Take care not to chip or damage the tiles during this process.
- Work in Sections: Work in small sections, removing the grout from between the tiles. It’s important to remove as much of the old grout as possible to ensure the new grout adheres properly.
- Clean the Joints: After the old grout is removed, use a scrub brush or toothbrush to clean out any remaining debris or dust from the joints. This step is crucial for ensuring a strong bond between the new grout and the tiles.
Step 2: Prepare the New Grout
- Choose the Right Grout: Select a grout that matches the width of your tile joints and the overall look you want to achieve. Sanded grout is best for wider joints, while unsanded grout is ideal for narrower ones.
- Mix the Grout: Follow the manufacturer’s instructions to mix the grout. The consistency should be similar to peanut butter—thick enough to hold its shape but still pliable for easy application.
Step 3: Apply the New Grout
- Spread the Grout: Using a rubber grout float, scoop some grout onto the surface of the tiles and press it into the joints. Hold the float at a 45-degree angle to ensure the grout is pushed deeply into the gaps between the tiles.
- Work Diagonally: Move the grout float diagonally across the tiles to fill all the joints. This technique helps prevent the grout float from pulling grout out of the joints.
- Remove Excess Grout: After the joints are filled, use the edge of the grout float to scrape away excess grout from the surface of the tiles. Be careful not to remove grout from the joints.
Step 4: Clean the Tiles
- Wipe Down with a Sponge: After the grout has set for about 15-30 minutes, use a damp sponge to wipe away any grout haze from the surface of the tiles. Rinse the sponge frequently in clean water to avoid spreading grout residue.
- Final Wipe: Once the grout has had time to set further, usually after a few hours, use a slightly damp cloth to give the tiles a final wipe down. This helps remove any remaining haze and ensures a clean, smooth finish.
Step 5: Seal the Grout
- Apply Grout Sealer: Once the grout has cured, typically after 24-48 hours, apply a grout sealer to protect it from moisture and stains. Use a small brush or applicator to apply the sealer evenly along the grout lines.
- Allow to Dry: Let the sealer dry completely according to the manufacturer’s instructions before using the kitchen floor.
Tips for Successfully Regrouting Kitchen Floor Tiles
To ensure a successful regrouting project, consider these additional tips:
Work Carefully to Avoid Damage
- Protect the Tiles: Be cautious when removing the old grout to avoid chipping or cracking the tiles. If using a power tool, maintain a steady hand and gentle pressure.
Choose the Right Grout Color
- Matching vs. Contrasting: Decide whether you want the grout to match the tiles for a seamless look or contrast for a more defined pattern. Grout color can significantly impact the overall appearance of your kitchen floor.
Regular Maintenance
- Keep Grout Clean: Regularly clean your grout lines with a mild cleaner to prevent dirt and stains from building up. Avoid using harsh chemicals that could damage the grout or tiles.
- Reapply Sealer as Needed: Grout sealer should be reapplied every year or as needed, especially in high-traffic areas. This will help maintain the grout’s appearance and protect it from moisture.
Consider Professional Help for Large Areas
- Hire a Professional: If regrouting a large area feels overwhelming or if the grout damage is extensive, consider hiring a professional to ensure the job is done efficiently and effectively.
Conclusion
Learning how to regrout kitchen floor tiles is a practical and rewarding way to restore the beauty and functionality of your kitchen floor. By following the steps outlined in this guide—removing old grout, applying new grout, cleaning the tiles, and sealing the grout—you can achieve a fresh, clean look that enhances the overall appearance of your kitchen.
Regular maintenance and careful attention to detail will help your regrouted tiles stay in top condition, ensuring your kitchen floor remains attractive and durable for years to come.


